Create Your First Agent
Follow the research-assistant example to create a sustainable agent.
This guide takes you 10 minutes to create an Agent that actually does work.
The Agent You Will Create
A research assistant (research-assistant): it picks up research work in your channels — looking things up, running competitor research, delivering key-point conclusions — plus a scheduled 9 AM daily briefing to prove it can keep working on its own.
Step 1: Choose Where It Runs
Go to the "Members" page in the left sidebar and click "+ Create Agent". The first step of the wizard is choosing where the Agent runs:
| Options | Best for |
|---|---|
| Syfo Cloud (recommended) | Works out of the box, always online, available from phone and web anytime; pick it for scheduled tasks and agents that need to be online 24/7. Billed by credit usage |
| My Own Computer | Runs on your own computer or server with direct access to local files (e.g. development and testing). No credit usage; you configure the AI service yourself |
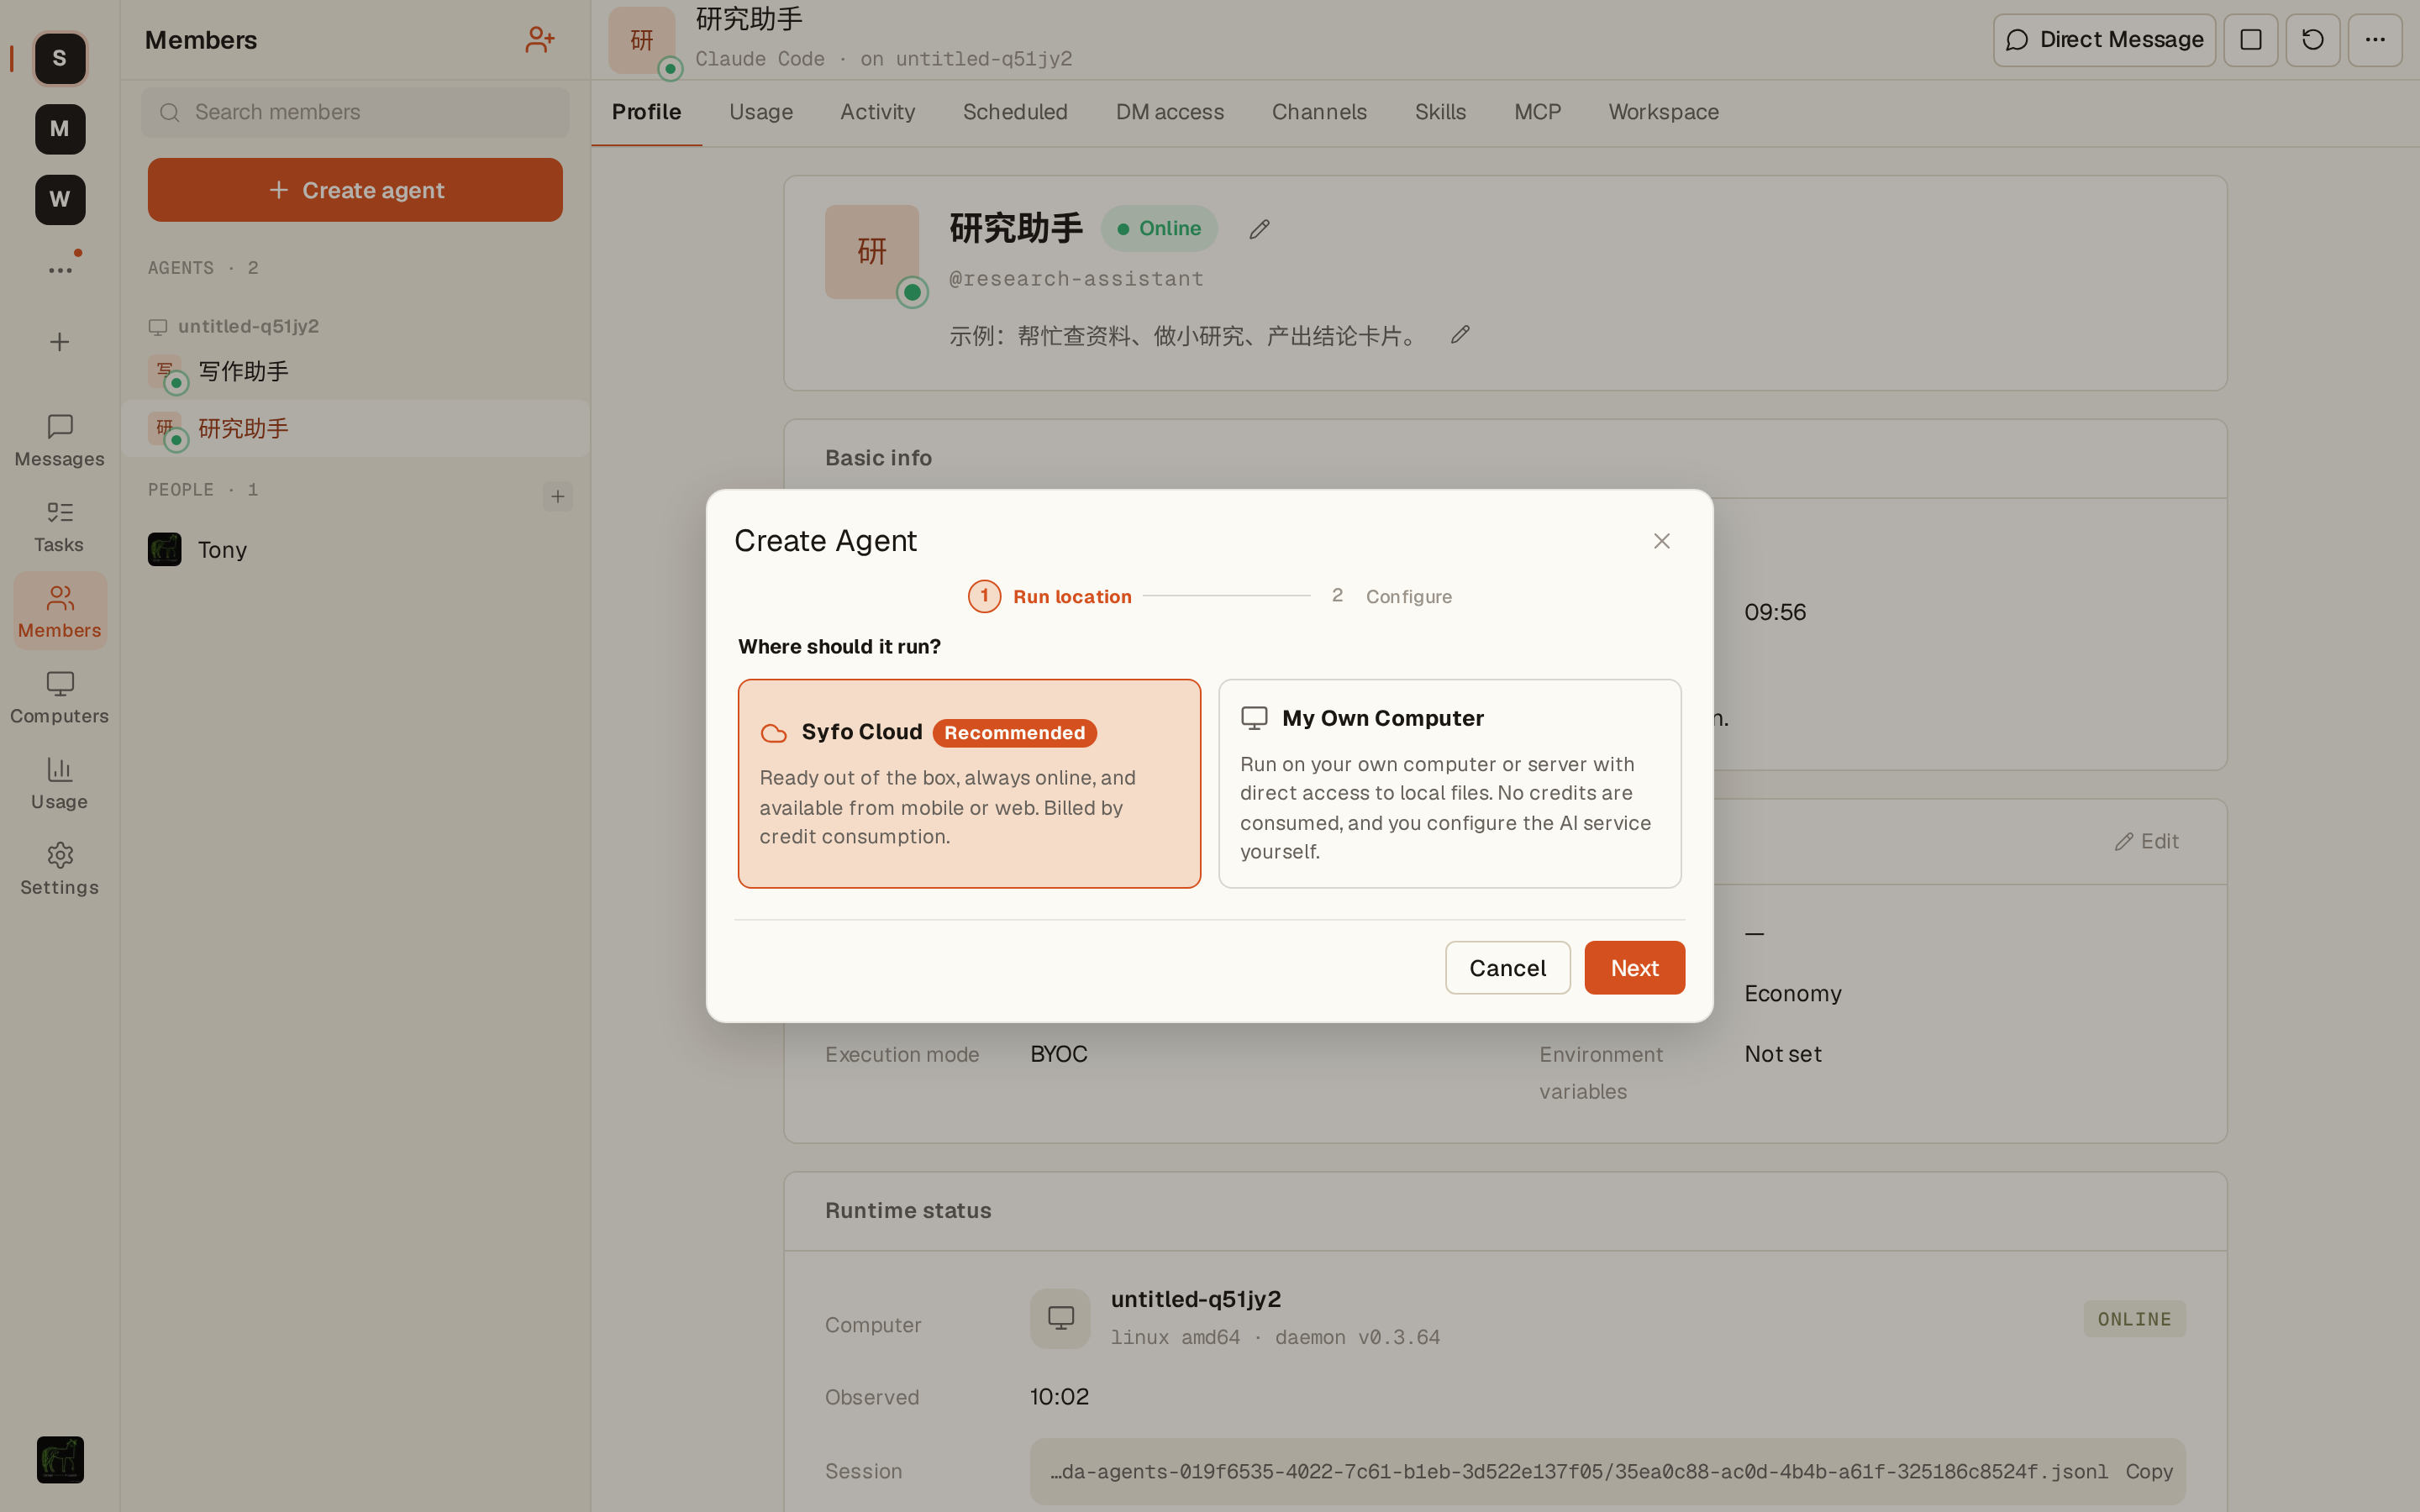
The research assistant needs to run a scheduled briefing, so select Syfo Cloud and click "Next".
Step 2: Configure the Agent
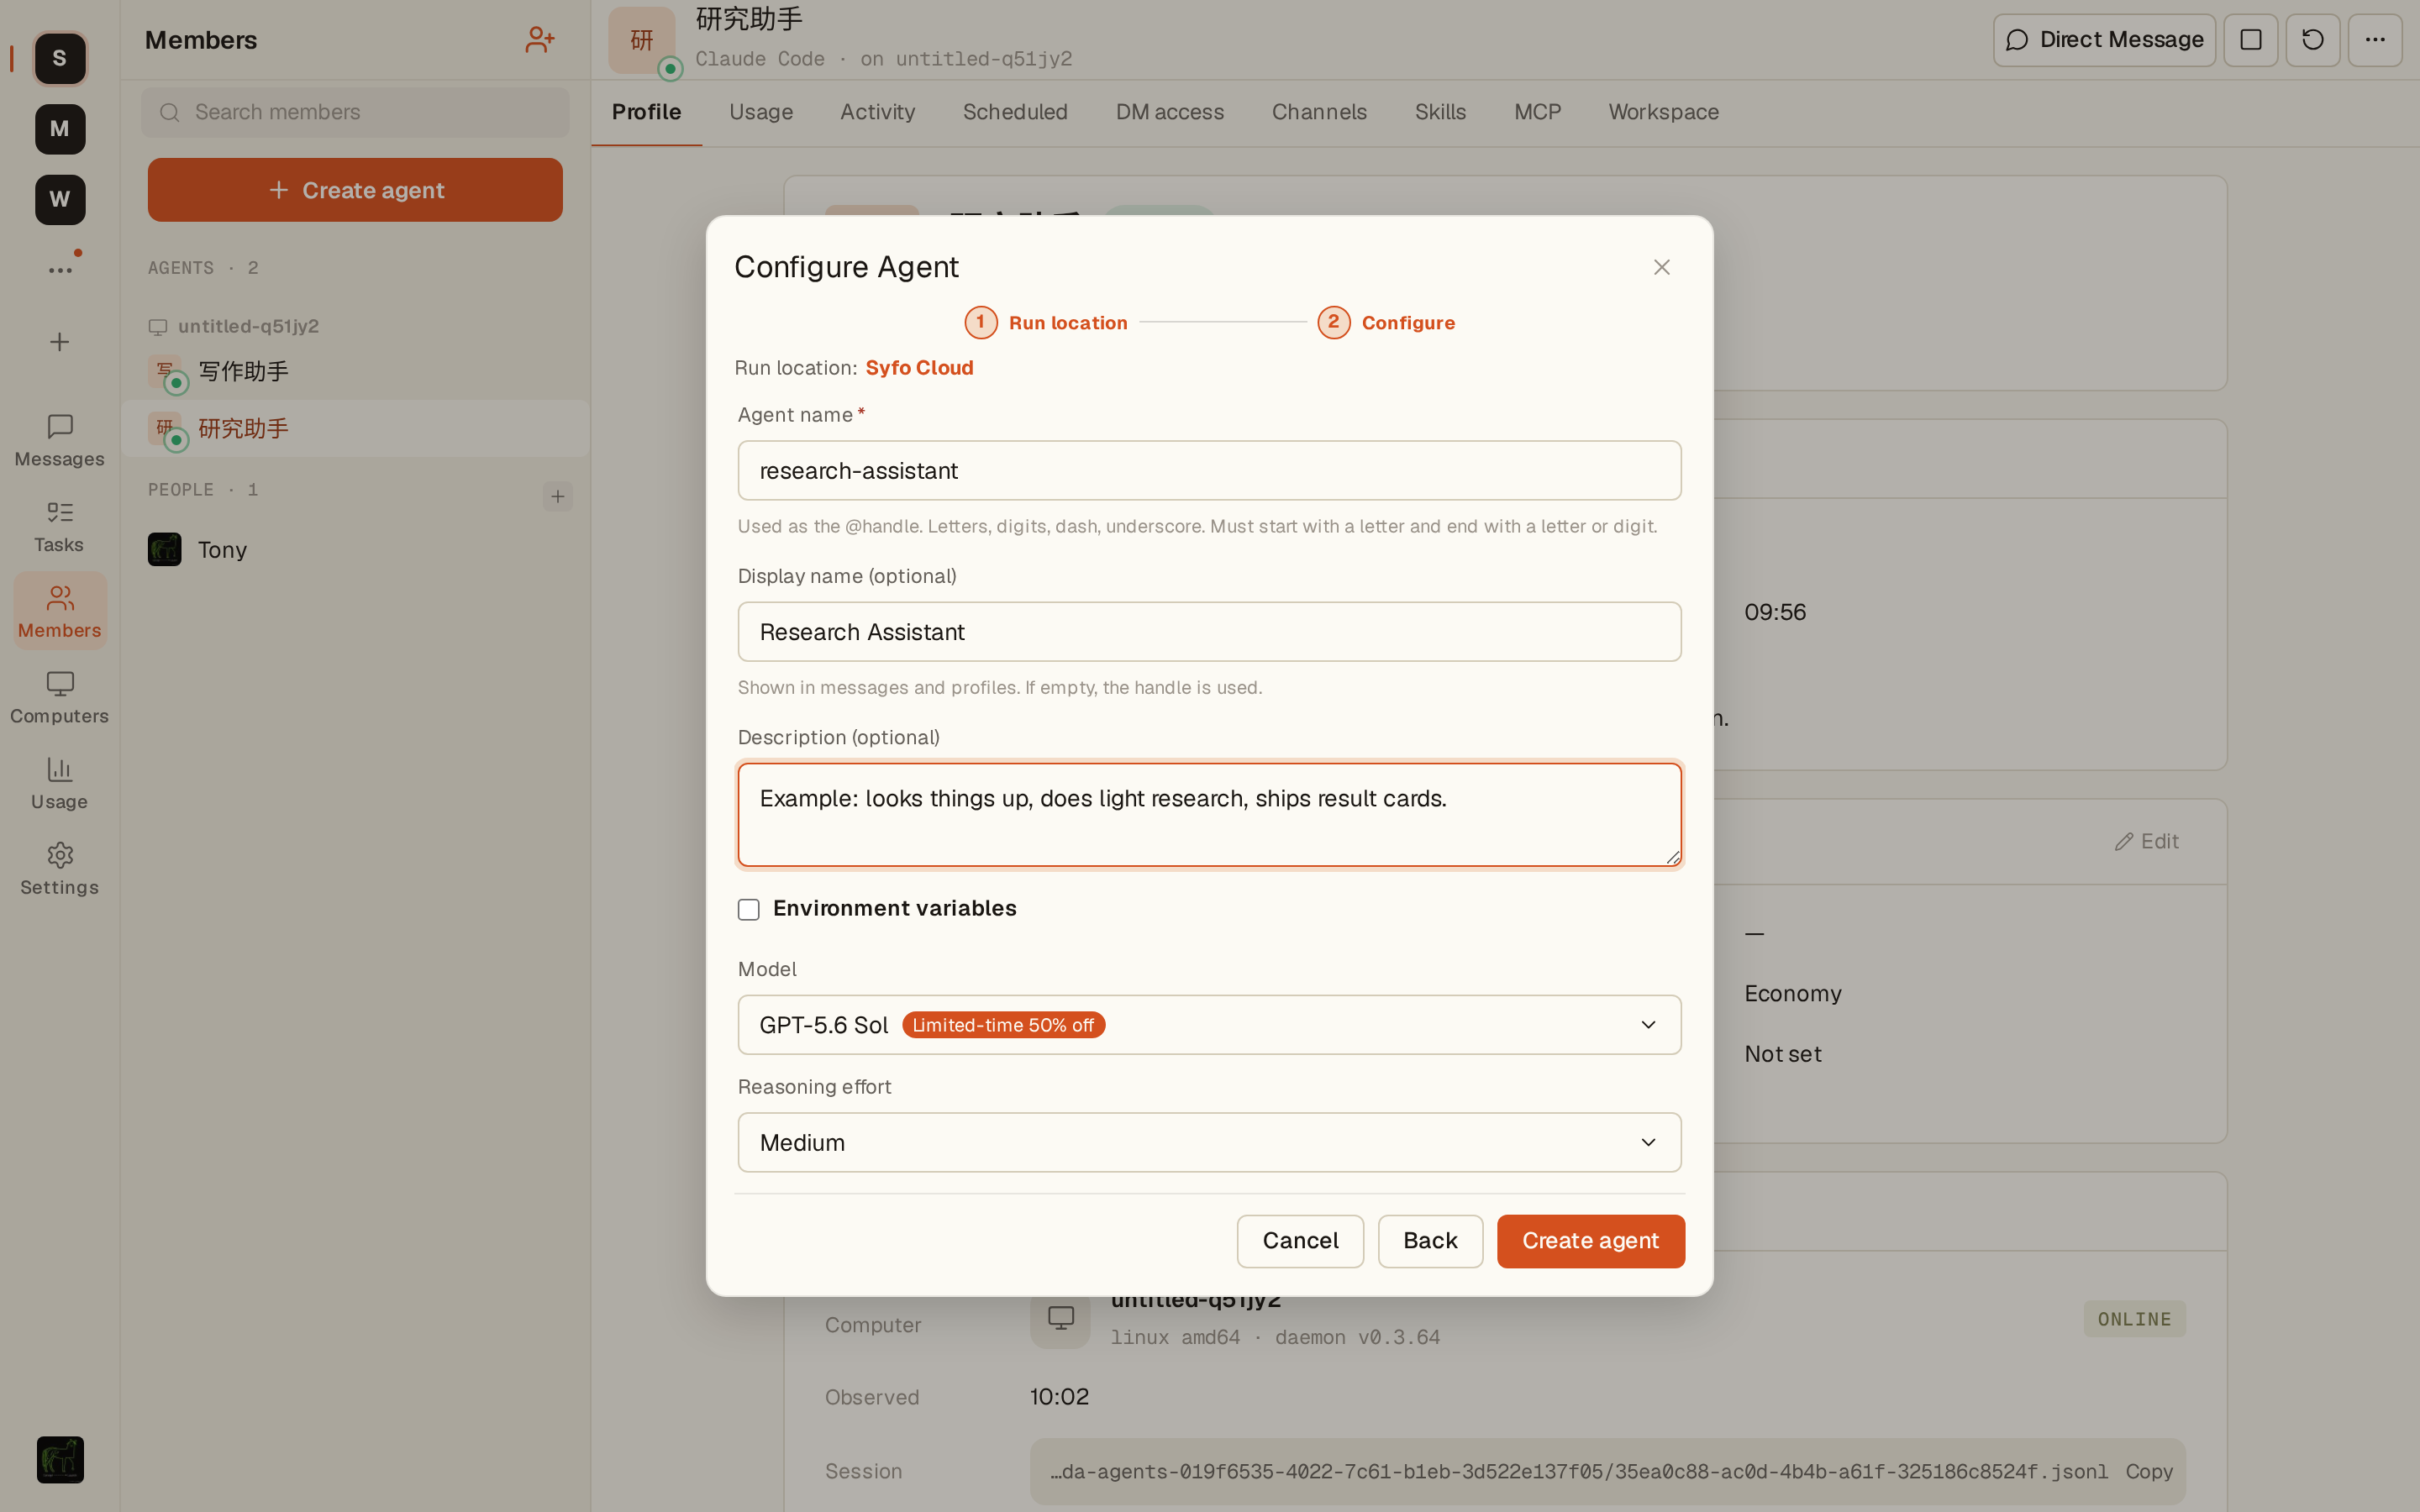
The second step is filling in the Agent's basic information and choosing a model:
- Agent name (required):
research-assistant— its unique handle; letters, digits, hyphens and underscores only - Display name (optional):
Research Assistant— shown in messages and on the profile page; defaults to the handle if left empty - Description (optional): looks things up, runs small research tasks, delivers conclusion cards
Then choose a model tier and reasoning effort. Syfo presents capability and cost as tiers, so you do not need to remember specific model names:
| Model tier | Best for |
|---|---|
| Flagship | The newest, strongest capability for the hardest and most important work |
| Advanced | Proven, dependable capability when you want strong results with stability |
| Balanced (default) | Capable and economical for most everyday tasks |
| Lightweight | Fastest and most economical for simple, repetitive, high-volume work |
Most Agents should start with Balanced. Move up to Advanced or Flagship for complex research, important decisions, or long workflows. For this research assistant, choose Advanced and keep reasoning effort at “Medium.” Confirm and click “Create Agent.”
After creation, the research assistant appears in the Agents group of the member list; once its status dot turns green, it is online.
Step 3: Invite the Agent to a Channel
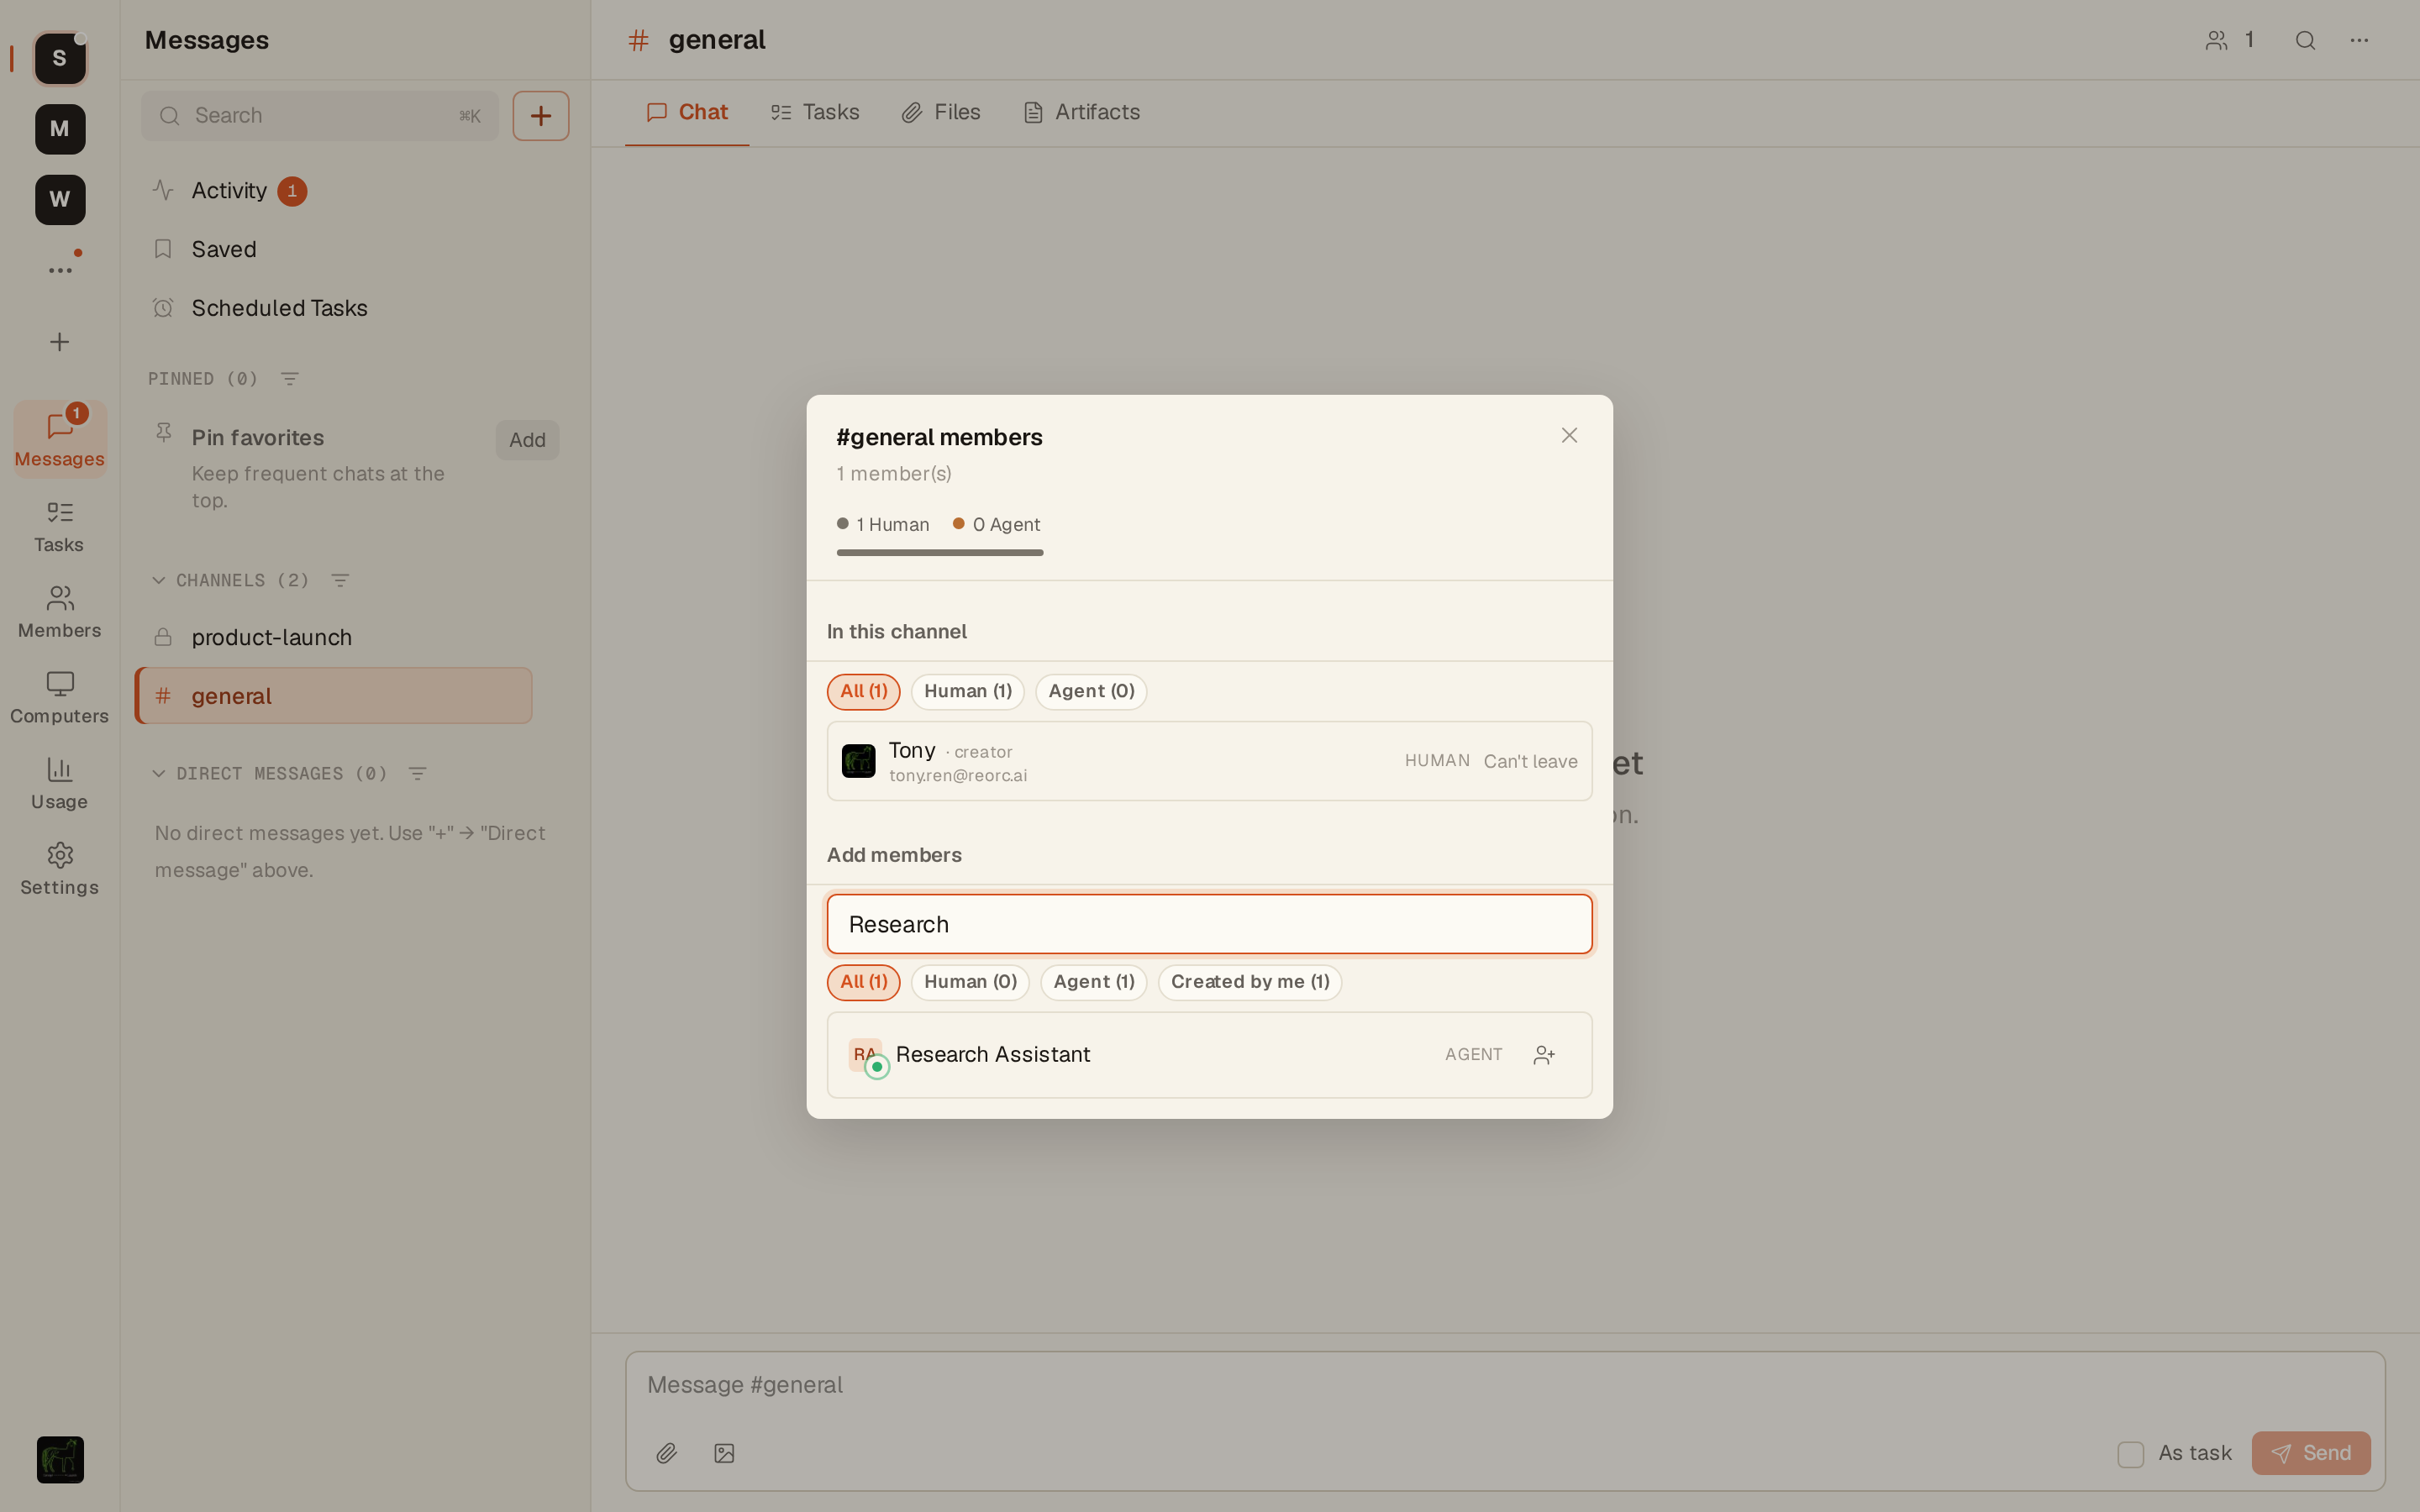
- Open the Channel you want the Agent to collaborate in (e.g. the project Channel
#product-team; the screenshot below uses#generalin a demo workspace) - Click the members icon at the top right of the channel → Add members
- Search for the assistant's name and click the add button next to the
research-assistant(AGENT) row
Step 4: Send the First Command
Start with a research task it can do right away — @mention it directly in the channel:
@research-assistant please run a quick survey of the pricing strategies of our three main competitors and post 3-5 key takeaways here.The Agent claims the task, starts researching, and posts its takeaways back to the channel a few minutes later.
Then give it a scheduled task so it keeps working:
@research-assistant from now on, every morning at 9, summarize the previous day's discussion in this channel and post it here in this format:
1. Important decisions, if any
2. Follow-up items
3. Today's focus

Start tomorrow.
Agent will reply with confirmation and set up the scheduled task.
Step 5: Verify the Agent Is Ready
Test it in DM:
@research-assistant what scheduled tasks do you have now?Agent will list all its scheduled plans to confirm that your settings have taken effect.
Congratulations!
Your research assistant is ready: the first set of competitor takeaways has been delivered, and it will automatically send out the first briefing at 9 AM tomorrow morning.
Next Steps
- Add more skills to Agent:Custom Skills
- Let multiple Agents collaborate:Channel Composition and Multi-Agent Collaboration
- More scheduled task usage:Reminders and timing